
Self Help Documentation
How to set up PAX A920 with TSYS on Heartland Restaurant.
This set up does require a Pax Store account (BroadPOS), and we recommend you go through the basic training with Pax to familiarize yourself with the Pax Store.
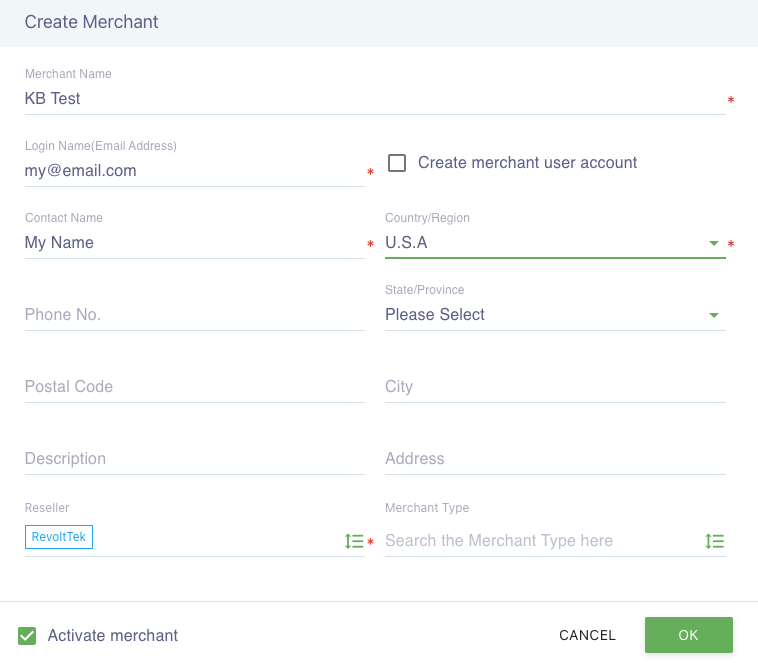
A. Adding a Merchant:
- Click on Terminal Management
- Select the green plus key, then Add Merchant
- Enter required info, we generally put our info in for email and choose not to select a “Create merchant user account”. Before clicking save be sure to check Activate merchant at the bottom.
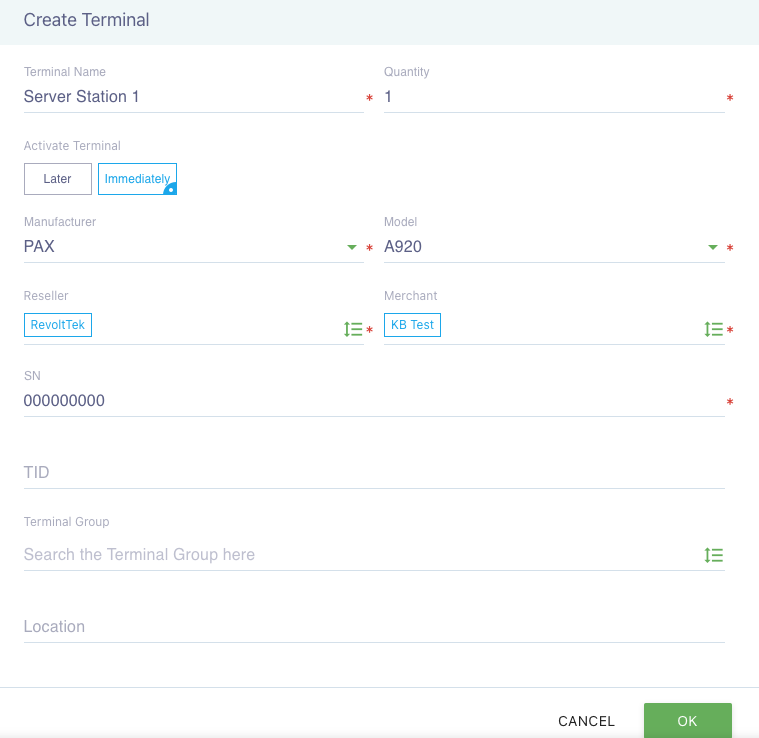
B. Adding a Terminal:
- Make sure you are in terminal management under the merchant you just created.
- Select Terminal List, then the +Terminal (green button on the right)
- Fill out the required info, and most importantly make sure Activate Terminal is set to Immediately.
- Select ok.
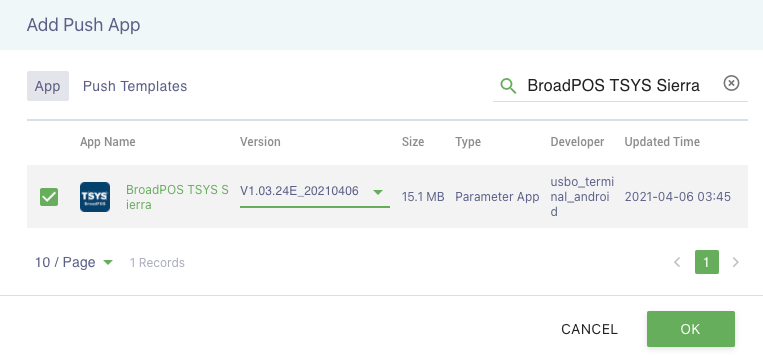
C. Adding App & Firmware
- Be sure you are in the terminal you just created (Terminal List–> Merchant–> Terminal List –> Device selected)
- Press App & Firmware towards the top, then + PUSH APP (Green on the right)
- Search for BoradPOS TSYS Sierra. This document used version V1.03.24E_20210406, we have not tested past this version but newer versions should not have an issue.
- Check the correct app, select version then ok. (Once you have created your first successful unit, you can save the file as a template to use in all future units)
D. Required merchant parameters & VAR sheet conversion
We recommend a different VAR sheet from the processor for each Pax unit, if not it can cause issues with the batch. You will have a different V number and different Terminal number From processor, request a TSYS Sierra Terminal Capture VAR.
- Bank Identification Number (BIN Number)
- Agent Bank Number (Agency Number)
- Agent Chain Number (Chain Number)
- Merchant Number (Vital Merchant ID)
- Store Number
- Terminal Number
- Merchant Name (DBA Name)
- Merchant City
- Merchant State
- City Code (Merchant Zipcode)
- Country Code
- Merchant Category Code (SIC Code)
- Time Zone Differential
- Terminal ID Number (Terminal ID); the letter ‘V’ must be replaced w/ ‘7’
- P2PE Mode -> Disabled
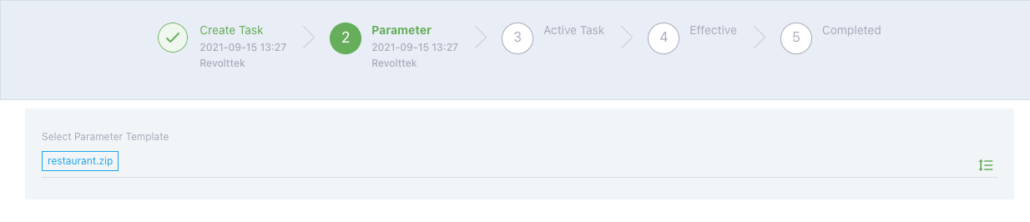
E. Parameter Template
- Be sure Resturant.Zip is selected.
F. Required Communication parameters
- In the Communication Tab, Semi-Integrations Only tab are the critical parameters that dictate how the POS system and PAX terminal communicate, and must match the options below.
- Limit Length -> 240
- Port -> 10009
- Communication Type -> Ethernet
- UART Baudrate -> 9600 bps
- Protocol Type -> HTTP GET
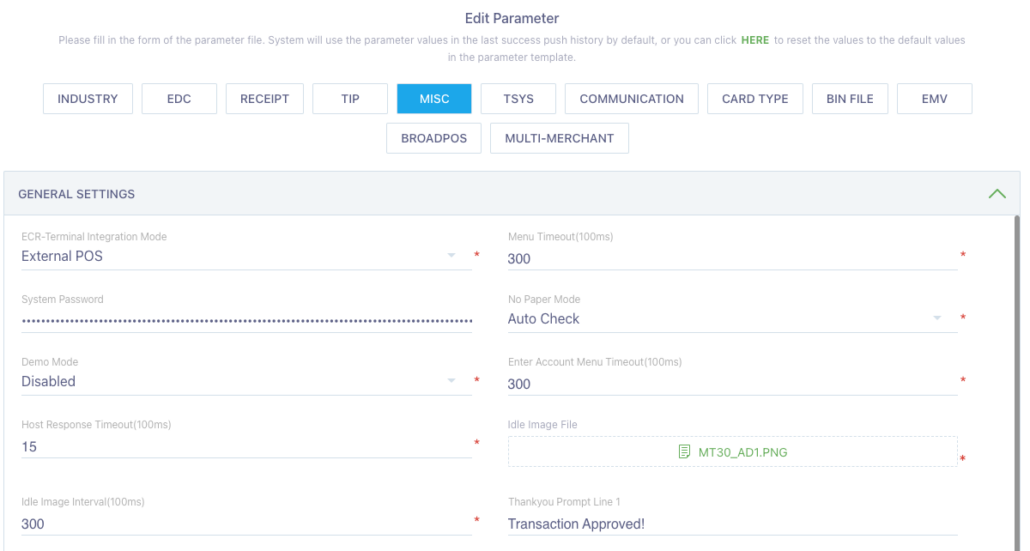
G. Misc Tab:
- Under Misc –> General Settings –> ERC-Terminal Integration Mode, select External Mode. This setting tells the pax the payment will be coming from a POS.
H. Batching
- Start Batch Time (eg. 04:00)
- End Batch Time (eg. 06:00)
- Note: this field can NOT be the same as Start Batch Time
- Interval for AutoDial (recommended: 3)
- Note: this field is the number of minutes before reattempting a failed or disrupted batch; the minimum is 3 minutes.
- We generally set a 2 hour window for Auto Batch time, incase of extended internet outage.
- Manuel batch: Set auto batch mode to off. This will require them to batch from the machine, although we don’t recommend.
I. Push for update/download:
- Once you have all the settings and parameters and settings finished select next on the bottom right.
- On the next page, select activate. Your pax is now ready for download and should update automatically if connected to WiFi.