Split Checks & Tickets
You can Split a check in a variety of ways in Heartland Restaurant. This allows for parties of multiple people to easily split
up what they pay for on a ticket.
Doing A Split
To do a split:
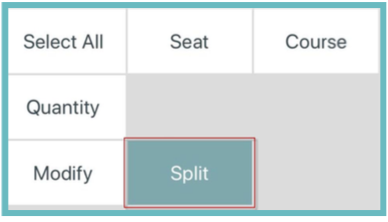
- ● Select the desired ticket. Once in the Order screen select Split from the Left-Handed menu. Here are the options that display:
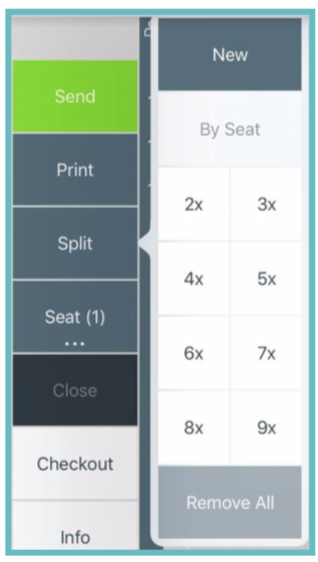
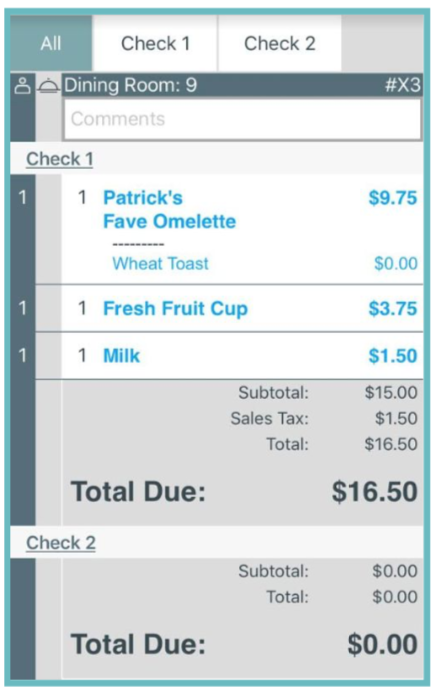
● New: This option creates a new empty check within the ticket. Below is the result.
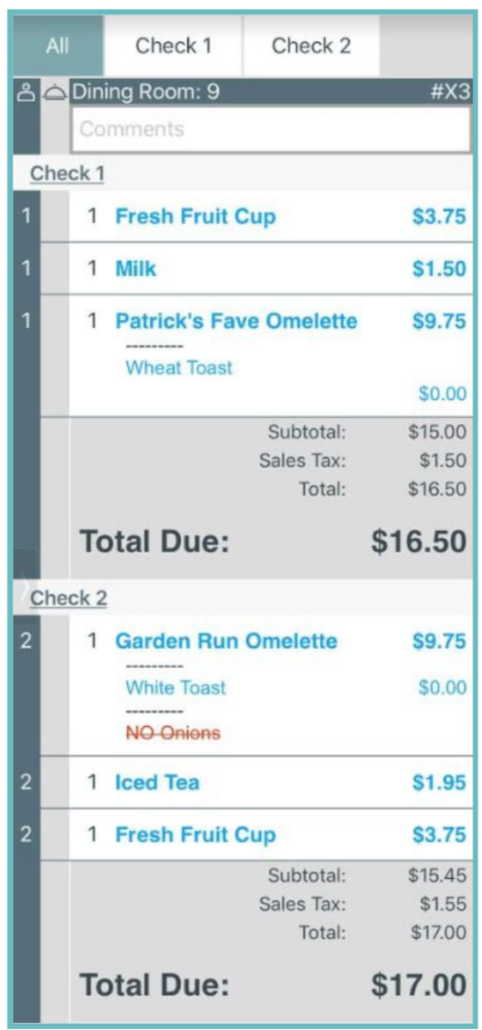
● By Seat: This option will split the check based on seats(this will be greyed out if there are no seats on the ticket
or only 1 seat). In the below example, I used Seat 1 and Seat 2 and split(seat numbers are highlighted in red).
● Remove All: Selecting this will remove any Splits and all items will be parented to the ticket as it was originally.
Viewing and Navigating Split Tickets
Splits in Heartland Restaurant will keep everything under the same ticket but will show multiple checks that you can view separately.
- ● You can select to view all checks or just a particular check at the top of the Ticket Preview once split. In the below example I have just Check 1 selected.
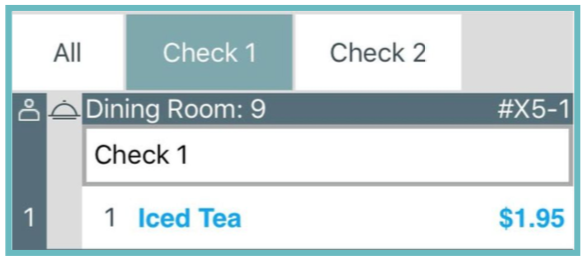
- ● Each Check has its own unique number within the ticket. For example if I have a ticket named #X5 and split it into two checks. The first check would be #X5-1(shown above) and the second check would be #X5-2.
- ● After splitting you can name the checks differently(can be edited where you see Check 1 in the white box above).
Additional Splitting Options
After a Split you can select items in the Ticket Preview and select Split in the bottom right.
● Move To: This option is used to move the selected items as a whole from one check to another within the ticket(The check the item is currently on will be greyed out). For example, If a server accidentally parented an item to Check 2 instead of Check 1 they could select Move To and tap on Check 1.
○ Unsplit To: If the selected item is already split by the bottom two methods already(Evenly, or Advanced) the button will change to Unsplit To. This is simply used to remove the split of the item and parent the whole item under a single check. For example, if a customer changes their mind on splitting an item 1⁄2 between Check 1 and Check 2 and instead wants the whole item on Check 2, they would select the item in either check, select Unsplit to, and tap on Check 2.
○ Note: The check you choose in the Unsplit To screen is the destination check of the item.
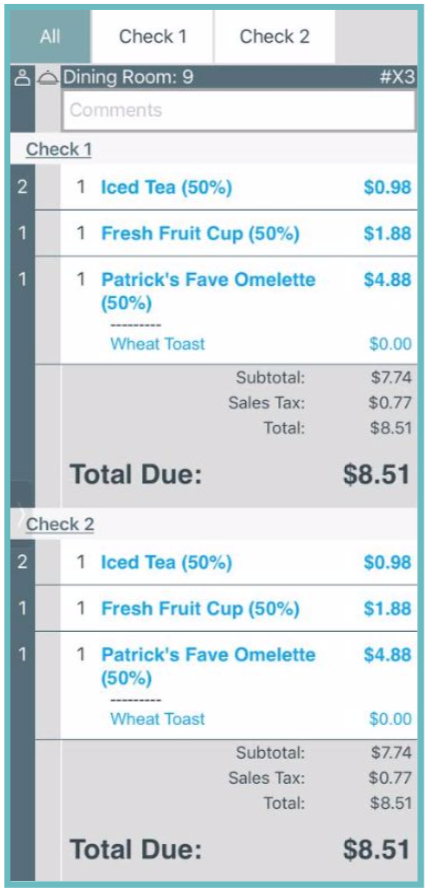
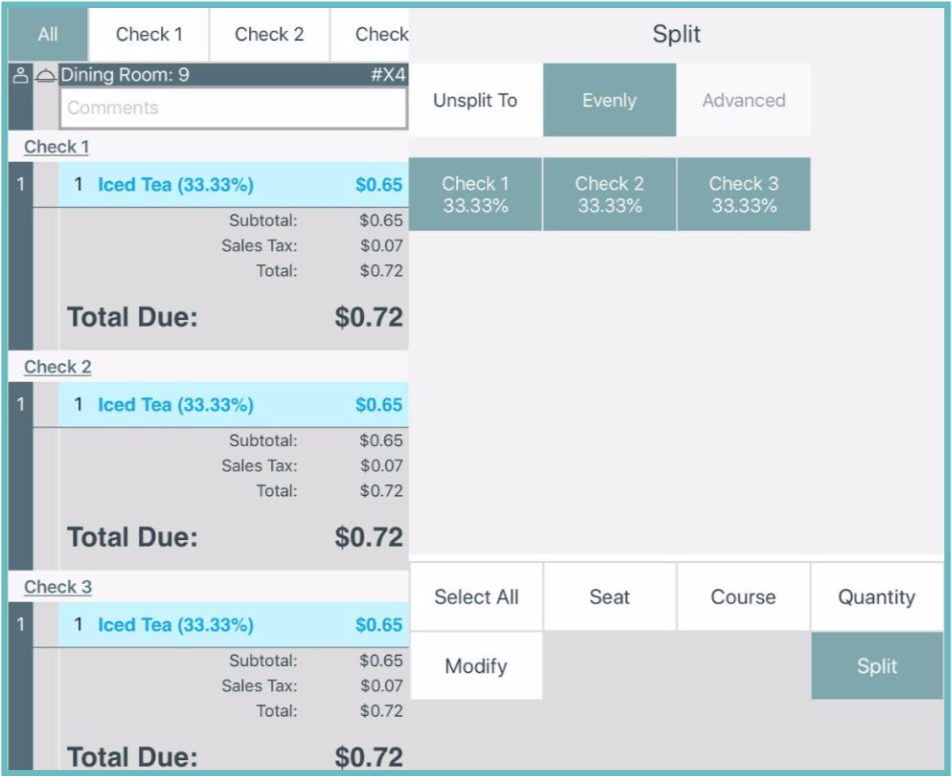
● Evenly: This option will allow you to split the price of selected items evenly across checks. For example, if there
are 3 total checks and Check 1 and Check 2 are splitting an Entree you can select Evenly to have 50% of the total item price on Check 1 and Check 2 , but not on the 3rd check(leave it deselected). Or across all 3 checks at 33.3% each(shown below)
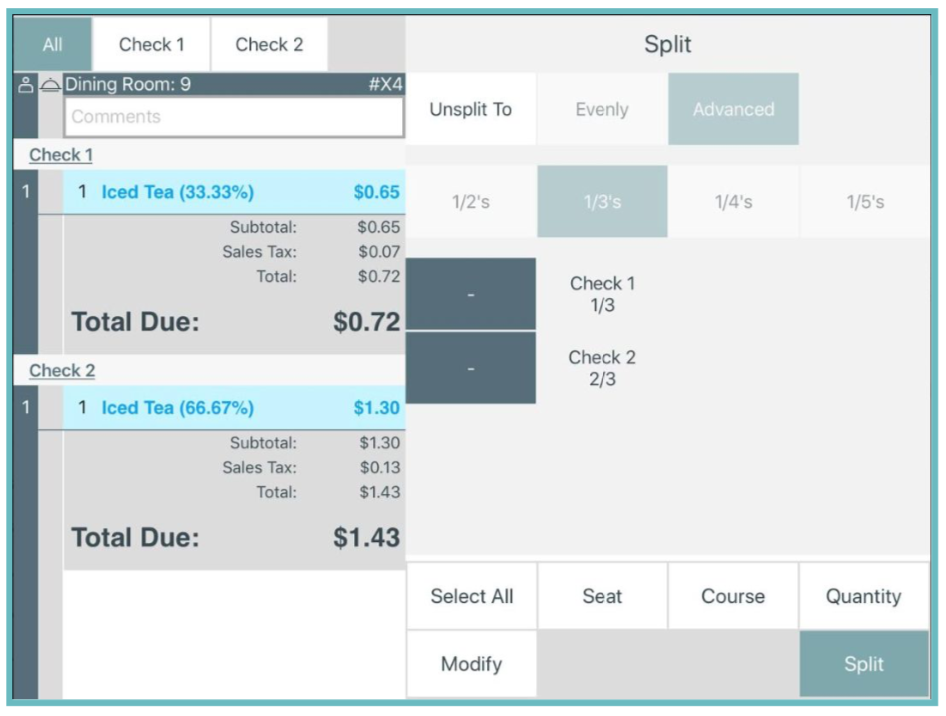
● Advanced: If you want to split an items price unevenly across multiple checks you can select Advanced and use Fractions to split it. Options include 1⁄2, 1⁄3, 1⁄4, and 1⁄5. For example if I want 1⁄3 of an item to go on check 1 and 2⁄3 of an item to go on another Check 2 I would select 1⁄3 and tap the + button once to add 1 third to Check 1 and then tap it twice to add 2 thirds to Check 2(results shown below).